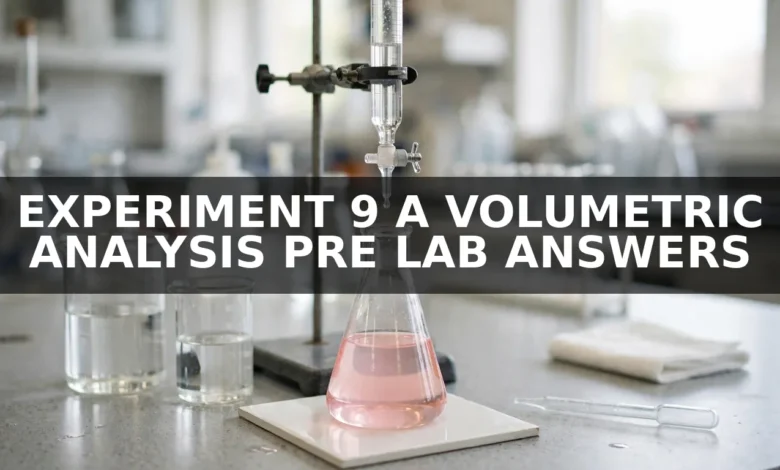
If you have just been handed the pre-lab sheet for Experiment 9 A Volumetric Analysis Pre Lab Answers, you are probably staring at questions about titrants, equivalence points and indicators and wondering where to start. This experiment looks intimidating on paper, then turns out to be surprisingly logical once you understand what you are doing — and why each step matters.
Volumetric analysis is a way of finding how much of something is in a solution by measuring how much of another solution it takes to react with it completely. You add a solution of known concentration, drop by drop, until the reaction is just complete, then use the volume added to work backwards to the concentration you did not know.
One honest note first: exact pre-lab questions vary by course and lab manual. No article can honestly reproduce your school’s answer key. This guide teaches the concepts behind experiment 9 a volumetric analysis pre lab answers, and walks you through the calculation, so you can answer your own sheet with confidence.
What Volumetric Analysis Actually Is
Volumetric analysis is a quantitative technique in chemistry, and its most familiar form is titration. You measure the volume of a solution of known concentration — the titrant — needed to react completely with a solution of unknown concentration — the analyte. Once you know that volume, and the balanced chemical equation, you can calculate the unknown concentration.
Imagine you have lemon juice and want to know how acidic it is, but you cannot measure the acid directly. You add a base of known strength, a little at a time, until the acid is exactly neutralised. If you know how strong the base was and how much you used, you can work out how much acid was there.
In most student versions of experiment 9 a volumetric analysis pre lab answers, the setup is an acid–base titration. A common example is standardised sodium hydroxide, NaOH, titrating an acid such as hydrochloric acid, HCl, or vinegar, which contains acetic acid. Your manual may use a different acid or base, but the logic does not change.
The word volumetric matters. Volume is the measurement that carries the experiment. You read volumes from a burette, carefully, to two decimal places, and those readings are the raw data everything else is built on. A sloppy volume reading goes straight into your calculation and into your final answer.
Key Terms You Need to Know
Titrant
The titrant is the solution of known concentration added from the burette. In many versions of experiment 9 a volumetric analysis pre lab answers it is standardised sodium hydroxide, NaOH. You control how much you add, and you record the volume used.
Analyte
The analyte is the solution of unknown concentration in the flask below the burette. You pipette a known volume of it into a conical flask, add indicator, and titrate it until the reaction is complete.
Standard Solution
A standard solution is a solution whose concentration is accurately known. It may be made by dissolving an accurately weighed amount of a pure substance in a known volume of water, or made approximately and then standardised. If its concentration is wrong, every result that follows is wrong too.
Primary Standard
A primary standard is a pure, stable, weighable substance used to prepare a standard solution directly, or to standardise another solution. It must be very pure, stable in air, unchanged on storage, and of reasonably high molar mass so weighing errors are small. Examples include potassium hydrogen phthalate, KHP, and anhydrous sodium carbonate. Sodium hydroxide is not a good primary standard, because it absorbs water and carbon dioxide from the air.
Equivalence Point
The equivalence point is the point at which the amount of titrant added is stoichiometrically equivalent to the amount of analyte present — the titrant and analyte have reacted in exactly the ratio given by the balanced equation. For a one-to-one reaction, it is reached when the moles of base added equal the moles of acid originally present. It is a theoretical point. You cannot see it directly.
Endpoint
The endpoint is the point at which the indicator changes colour, signalling that you should stop adding titrant. In a well-designed titration, it falls as close as possible to the equivalence point, but they are not the same thing. The equivalence point is defined by the chemistry. The endpoint is defined by what your eyes can see.
Indicator
An indicator is a substance, usually a weak acid or base, that changes colour over a particular pH range. You add a few drops to the analyte before you start. As the pH changes, the indicator changes colour, and that is your signal to stop. Phenolphthalein is the classic example: colourless in acid, pink in base.
Experiment 9 A Volumetric Analysis Pre Lab Answers: The Questions You Will Probably Face
Below are the questions that appear, in one form or another, on most experiment 9 a volumetric analysis pre lab answers sheets. Each starts with a direct answer, then the explanation your instructor is looking for.
1. What is the purpose of Experiment 9?
To determine the concentration of an unknown solution by titration with a solution of known concentration. In most versions, you use standardised sodium hydroxide to titrate an acid of unknown concentration, then calculate the acid’s molarity from the volume of base needed to reach the endpoint. A second purpose is to develop proper technique: accurate pipetting, correct burette reading, and careful observation of the endpoint.
2. What is volumetric analysis?
It is a quantitative method in which the volume of a solution of known concentration required to react completely with a known volume of a solution of unknown concentration is measured, and the unknown concentration is calculated from that volume and the balanced equation. That is the core idea behind experiment 9 a volumetric analysis pre lab answers.
3. What is the equivalence point?
The point at which the moles of titrant added are stoichiometrically equivalent to the moles of analyte present, according to the balanced equation. For HCl + NaOH → NaCl + H2O, the ratio is one to one, so the equivalence point is reached when the moles of NaOH added equal the moles of HCl originally in the flask.
4. What is the difference between the endpoint and the equivalence point?
The equivalence point is the theoretical point where titrant and analyte have reacted in exactly the stoichiometric ratio. The endpoint is the experimental point where the indicator changes colour and you stop. In an ideal titration they coincide. In practice they are very close but rarely identical, because the indicator changes colour over a pH range, not at a single pH. Writing that they mean the same thing is one of the most common pre-lab mistakes.
5. How do you choose the right indicator?
Choose one whose colour-change range includes the pH at the equivalence point. For a strong acid–strong base titration, the equivalence pH is 7, so phenolphthalein works well because its colourless-to-pink change is easy to see. For a weak acid–strong base titration, the equivalence point is above pH 7, so phenolphthalein is again suitable. For a strong acid–weak base titration, the equivalence point is below pH 7, so methyl orange is better.
6. What calculations do you need to do?
Moles equal molarity multiplied by volume in litres, and at the equivalence point the moles of titrant and analyte are related by the mole ratio in the balanced equation. For a one-to-one reaction this simplifies to C1V1 = C2V2. Use the titrant volume and its known concentration to find the moles of titrant, convert to moles of analyte, then divide by the volume of analyte pipetted.
7. Why do you rinse the burette with the titrant?
Any water left in the burette from washing would dilute the titrant. Diluted titrant means the concentration you think you are adding is not the concentration you are actually adding, and your results will be too low. Rinsing with the titrant itself, two or three times, removes the water and leaves the burette wet only with solution of the correct concentration. It feels wasteful, but it is one of the most important habits in the experiment.
8. Why do you not rinse the conical flask with the analyte, and why is distilled water fine?
You pipette an exact, known volume of analyte into the flask, and that number of moles is what you are analysing. Rinsing the flask with analyte would add an unknown extra amount. Rinsing with distilled water is harmless, because water adds no extra moles of analyte — it only dilutes the solution slightly. Remember: rinse the burette with titrant, rinse the pipette with analyte, never rinse the conical flask with analyte.
9. How do you read a burette correctly?
Read it at the bottom of the meniscus, with your eye level with the meniscus to avoid parallax error, and record the reading to two decimal places, for example 24.35 mL. The second decimal is an estimate — the burette is usually graduated in 0.10 mL divisions — but record it anyway. Before you start, check for air bubbles in the tip, because a bubble that escapes during the titration will look like titrant delivered when it was not, and your volume will be too high.
10. What are the main sources of error?
Reading the burette incorrectly, overshooting the endpoint, using the wrong indicator, leaving air bubbles in the tip, rinsing glassware incorrectly, and using a titrant whose concentration is not accurately known. Near the endpoint, add titrant drop by drop and stop at the first faint colour change lasting about thirty seconds. Repeat until you get concordant titres, within about 0.10 mL, and average them.
Step-by-Step Procedure Overview
Follow your lab manual if it differs from this summary. This is the standard sequence most versions of experiment 9 a volumetric analysis pre lab answers share.
First, prepare your solutions. Rinse the burette with the titrant, fill it, clear air bubbles from the tip, and record the initial reading to two decimal places. Next, pipette a known volume of analyte — commonly 25.00 mL — into a clean conical flask, rinsing the pipette with the analyte first. Add two or three drops of phenolphthalein and swirl to mix.
Then titrate for experiment 9 a volumetric analysis pre lab answers. Place the flask under the burette on a white tile and add titrant while swirling continuously. At first you can add it fairly quickly. As you approach the endpoint, slow down and add drop by drop. The endpoint is the first drop that gives a faint pink colour lasting about thirty seconds. Record the final reading immediately.
Finally, repeat. The first titration is often a rough run to find the approximate endpoint. Then do at least two more careful titrations and look for concordant titres. Subtract the initial reading from the final reading for each run, average the concordant titres, and use that average in your calculation.
The Calculation: C1V1 = C2V2 Worked Example
Here is an illustrative example with made-up-but-plausible numbers, for experiment 9 a volumetric analysis pre lab answers. It is not taken from any real lab manual and it is not an answer key. It is a worked method you can copy, replacing the numbers with your own.
Suppose 25.00 mL of 0.100 M NaOH is required to neutralise 20.00 mL of hydrochloric acid, HCl, of unknown concentration. What is the concentration of the acid? The balanced equation is HCl + NaOH → NaCl + H2O, a one-to-one ratio.
Step one: convert the NaOH volume to litres. 25.00 mL is 0.02500 L. Step two: moles of NaOH = 0.100 mol/L × 0.02500 L = 0.00250 mol. Step three: one mole of NaOH reacts with one mole of HCl, so moles of HCl = 0.00250 mol. Step four: the HCl volume was 20.00 mL, or 0.02000 L, so its concentration = 0.00250 mol ÷ 0.02000 L = 0.125 mol/L. The answer is 0.125 M HCl.
The same calculation can be written as C1V1 = C2V2: 0.100 M × 25.00 mL = C2 × 20.00 mL, giving C2 = 0.125 M. If the mole ratio is not one to one, adjust for it. For sulfuric acid, H2SO4 + 2NaOH → Na2SO4 + 2H2O, two moles of NaOH react with one mole of acid, so moles of acid equal half the moles of base. Always write the balanced equation first. Use the average titre, and give the answer to three significant figures.
Common Mistakes and How to Avoid Them
Overshooting the endpoint is the biggest mistake, and the one that costs the most marks in experiment 9 a volumetric analysis pre lab answers. Keep the tap open and wait for a strong pink, and by the time you see it you have added far too much. Slow down before the endpoint, add drop by drop, and stop at the faintest permanent pink.
Reading the burette from above or below causes parallax error. Keep your eye level with the meniscus. Forgetting air bubbles is another quiet error: when a bubble escapes, the level falls without titrant reaching the flask, so your titre looks too large. Write each reading down the moment you take it, with units, to two decimal places.
Safety Notes
Wear safety goggles throughout experiment 9 a volumetric analysis pre lab answers, and a lab coat if your institution requires one. Sodium hydroxide is corrosive and can cause serious eye damage, so if it splashes into your eyes, rinse with plenty of water immediately and tell your instructor. Acids can irritate skin, so wash skin spills with plenty of water. Never pipette by mouth. Dispose of solutions in the containers your instructor specifies.
FAQ
These are the questions students most often ask about experiment 9 a volumetric analysis pre lab answers.
Q: What is Experiment 9 volumetric analysis in simple terms?
A: A titration in which you find the concentration of an unknown solution by measuring how much of a known solution it takes to react with it completely.
Q: What is the difference between the endpoint and the equivalence point in Experiment 9?
A: The equivalence point is the theoretical point where titrant and analyte have reacted in exactly the ratio in the balanced equation. The endpoint is where the indicator changes colour and you stop. In a good titration they are very close, but they are not the same thing.
Q: Which indicator is used in Experiment 9 volumetric analysis?
A: It depends on the titration. Phenolphthalein is most common for strong acid–strong base and weak acid–strong base titrations, changing from colourless to pink in base. For strong acid–weak base, methyl orange is more suitable.
Q: How do you calculate the unknown concentration in a titration?
A: Use moles = molarity × volume in litres, with the mole ratio from the balanced equation. For a one-to-one reaction, C1V1 = C2V2. Find the moles of titrant, convert to moles of analyte, and divide by the analyte volume.
Q: Why is my titration result different from my partner’s?
A: Small differences are normal, from endpoint judgement, burette reading and technique. Large differences usually point to overshooting, an air bubble, incorrect rinsing, or a calculation mistake. Repeat until you have concordant titres and average them.
Q: Can I use the volume from a single titration?
A: You can, but do not rely on it. One titration gives no way to check the endpoint. Averaging two or three concordant titres is far more reliable.
Conclusion
Experiment 9 A Volumetric Analysis Pre Lab Answers become much less daunting once you see the experiment as a single chain: a known solution, an unknown solution, a careful volume measurement, and a calculation that connects them. Learn the key terms until you can explain them without notes, and practise the C1V1 = C2V2 calculation with your own numbers before the lab.
Go into the lab knowing what the equivalence point is, how it differs from the endpoint, why you chose your indicator, and what your calculation will look like. Then the pre-lab sheet for experiment 9 a volumetric analysis pre lab answers will feel like a summary of things you already understand.
Read Also: Cc76.org Alternative Learning Center (2026 Guide)